How To: connect Seedr and Plex with WebDAV

As our digital libraries continue to grow and expand, the need for efficient and seamless streaming solutions has become more important than ever. Whether you're a movie buff, a TV series enthusiast, or an avid listener of music and podcasts, having a streamlined and user-friendly platform to manage and access your content is crucial. This is where the powerful combination of Seedr, Plex, and WebDAV comes into play, allowing you to bridge the gap between your favorite services and enjoy your content without any hassle.
There are several reasons why you might want to connect Seedr and Plex using WebDAV. For instance, you may have a large collection of media files stored on Seedr, a cloud-based torrent downloading and streaming service, and wish to access and manage them through Plex's user-friendly interface. Alternatively, you might be looking for a way to stream your content on various devices, such as smart TVs, gaming consoles, or mobile devices, without the need for downloading or transferring files. By integrating Seedr and Plex with WebDAV, you can achieve these goals and enjoy a seamless streaming experience.
Since Plex blocked third-party addons, users have been searching for alternative methods to integrate their preferred services. One such method is mounting FTP or WebDAV from Seedr onto your device as a drive and then connecting it to Plex. In this post, we'll focus on the WebDAV approach, which offers a more stable and secure connection.
We created a Plex account in the last article and got everything ready for streaming. Now let's make a connection between Plex and Seedr, so you can conveniently watch movies where you are used to.
So, let's dive in and learn how to set up this powerful combination of Seedr, Plex, and WebDAV to elevate your streaming experience!
In Seedr, you first need a Master premium account, which includes a WebDAV Drive.
Choosing the WebDAV client
When choosing a WebDAV client for bridging Plex and a cloud storage service, consider the following factors:
- Platform compatibility: Ensure that the WebDAV client is compatible with the operating system you plan to use for running Plex. For example, if you're using Windows, RaiDrive or Cyberduck would be suitable options.
- Ease of use: Look for a WebDAV client with a user-friendly interface and straightforward setup process, as this will make it easier for you to connect your cloud storage to Plex.
- Reliability and performance: Choose a WebDAV client known for its stability and efficient performance, as this will ensure a smooth streaming experience when accessing your media files through Plex.
- Support for your cloud storage service: Verify that the WebDAV client you choose supports the specific cloud storage service you plan to use with Plex. It is not about Seedr: we are ok with all clients.
Ultimately, the choice of WebDAV client depends on your specific needs and preferences. You may want to try out a couple of options to see which one works best for your setup.
The recommended WebDAV clients for bridging Plex and cloud storage are:
- RaiDrive for Windows and Linux: A user-friendly and reliable WebDAV client that allows you to map multiple cloud storage services as network drives.
- Cyberduck for Windows and macOS: A versatile, open-source WebDAV client that supports multiple protocols and offers a seamless integration with both Windows and macOS.
- Nautilus (and also RailDrive) for Ubuntu: The built-in file manager in Ubuntu, which has native support for connecting to WebDAV servers, eliminating the need for a separate WebDAV client.
If you like any other WebDAV client, want to recommend it, or need a tutorial, please let us know. We'll be sure to add a tutorial.
Installing WebDAV Clients for Bridging Plex and Cloud Storage
In this section, we'll provide a brief overview of the installation process for the recommended WebDAV clients: RaiDrive for Windows, Cyberduck for Windows and macOS, and Nautilus for Ubuntu.
- RaiDrive (Windows):
- For RaiDrive, it's essential to download the correct installer for your specific operating system version, as RaiDrive offers multiple options. On the screenshot are RaiDrive installers for Windows, but it also supports various Linux distributions (such as Ubuntu, Fedora, etc.) and macOS. Scroll through the official website to find the appropriate installer for your operating system.
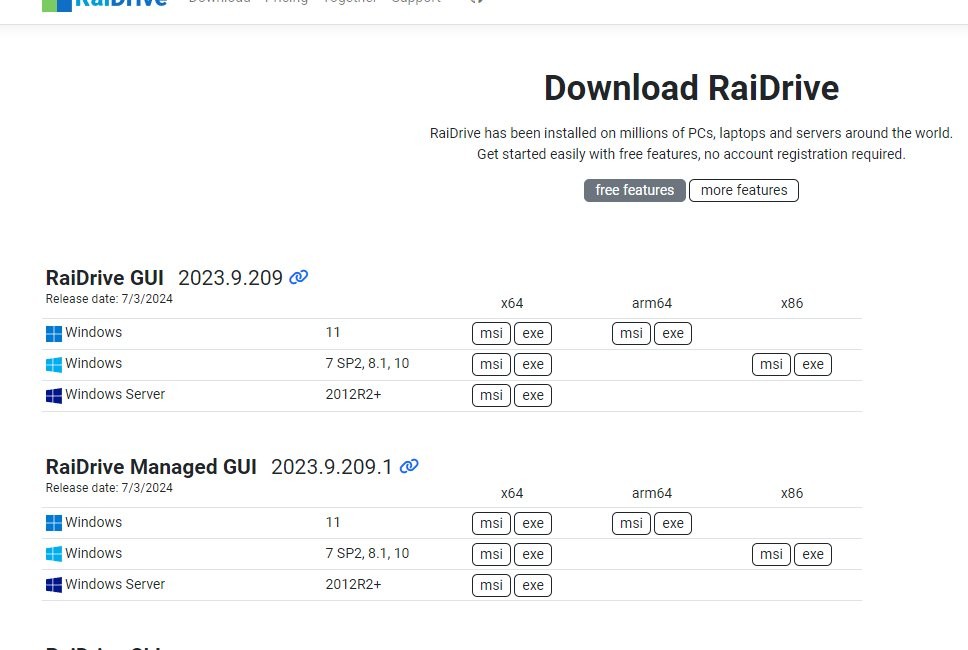
- Once you have downloaded the appropriate RaiDrive installer for your operating system, run the installer and follow the on-screen instructions to complete the installation process.
- The installation process is straightforward, and once completed, you'll be ready to connect to your cloud storage service using WebDAV.
- Cyberduck (Windows and macOS):
- To install Cyberduck, visit the official website and download the appropriate version for your operating system (Windows or macOS). Run the installer and follow the on-screen instructions to complete the installation. Once installed, you'll be prepared to connect to your cloud storage service using WebDAV through Cyberduck.
- Nautilus (Ubuntu):
- Nautilus is the default file manager in Ubuntu and comes pre-installed with the operating system. No additional installation is required. You can use Nautilus to connect to your cloud storage service using WebDAV when needed.
With these WebDAV clients installed, you're now ready to connect to your cloud storage service and add the mounted directories to your Plex library, enabling seamless streaming of your media files. The next part will cover the steps for connecting to your cloud storage using WebDAV.
Connecting Seedr to RaiDrive on Windows
In this section, we'll guide you through the process of connecting your Seedr account to RaiDrive using WebDAV on Windows. Please refer to the provided screenshots for a visual representation of each step.
- Launch RaiDrive: After successfully installing RaiDrive, open the application by double-clicking the RaiDrive icon on your desktop or in your Windows Start menu.
- Add a new drive: In the RaiDrive main window, click the "Add" button to create a new network drive.
- Enter Seedr WebDAV URL: In the "Server Address" field, enter the Seedr WebDAV access link: https://dav.seedr.cc/
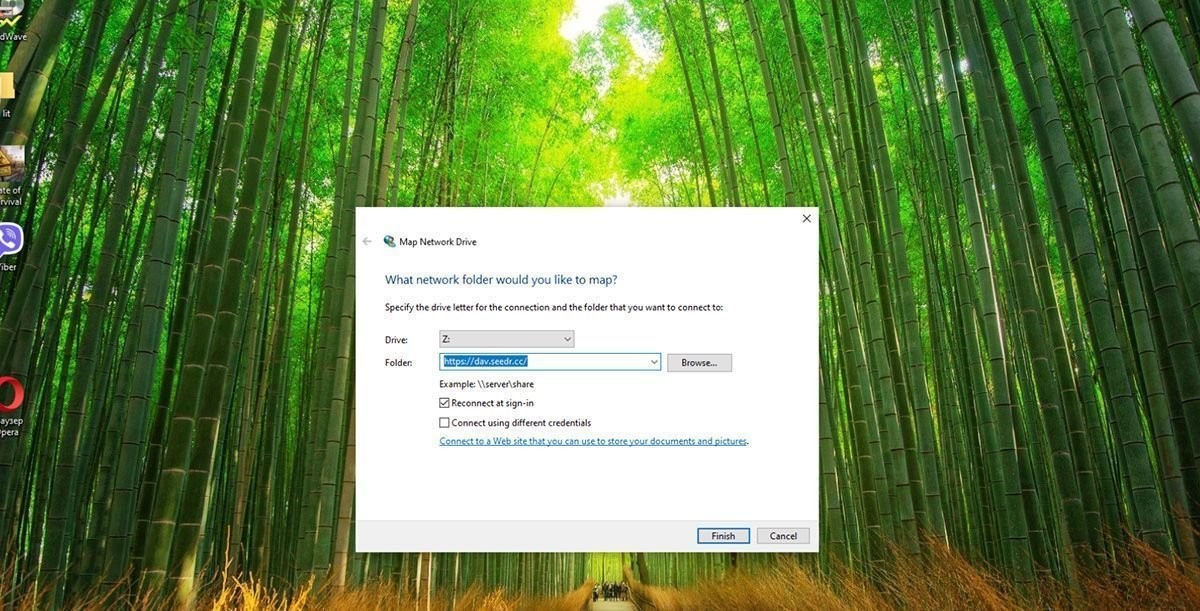
- Enter your Seedr credentials: Provide your Seedr account email and password in the respective fields. Connect to Seedr: Click the "OK" button to establish the WebDAV connection to your Seedr account. RaiDrive will now connect to Seedr and mount it as a network drive on your Windows device.
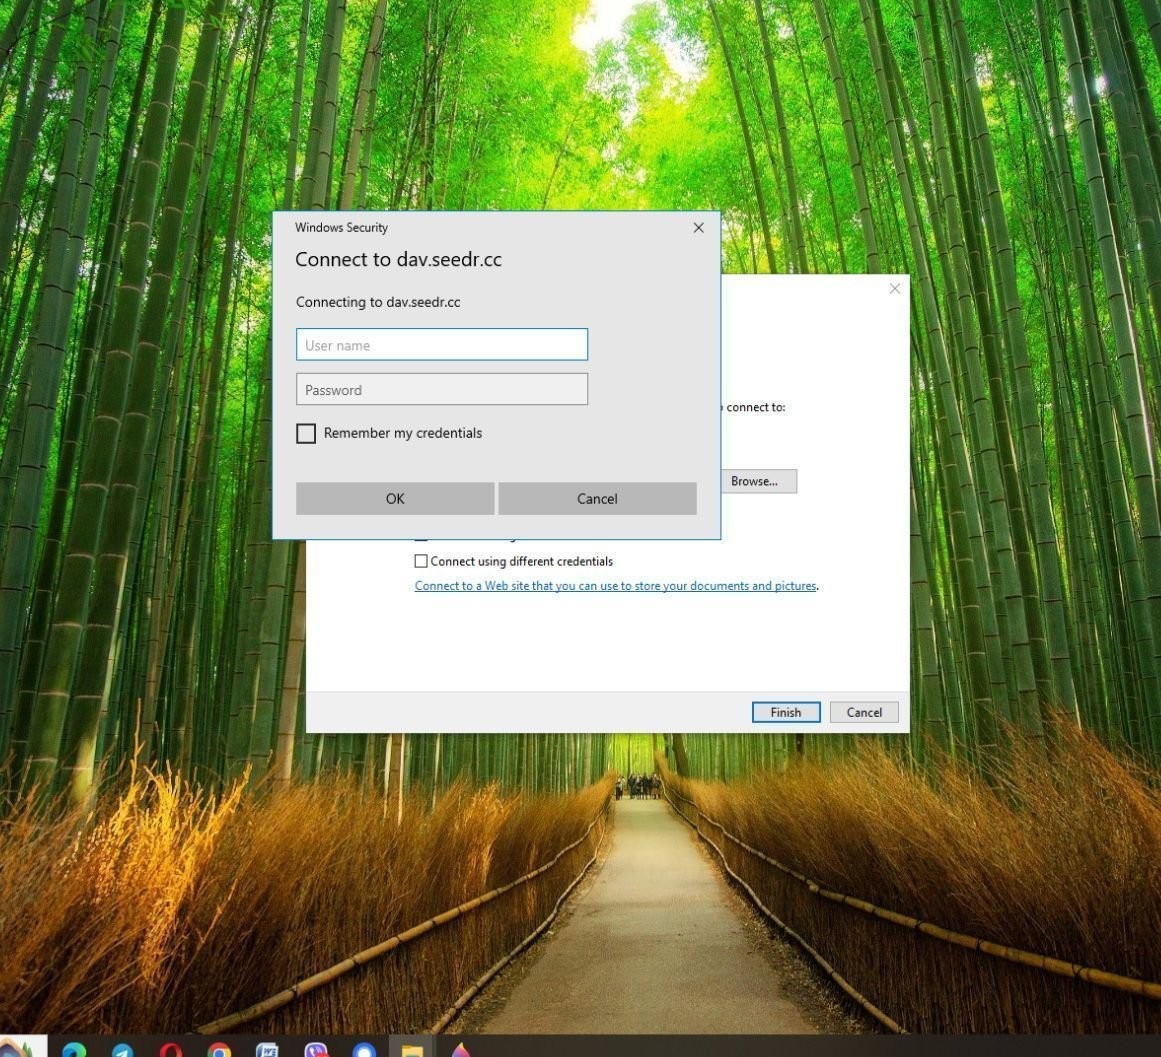
- With your Seedr account connected to RaiDrive using WebDAV, you can now access your Seedr files directly from your Windows device. You will see your Seedr storage as one more disc.

Connecting Seedr to Cyberduck (Windows and macOS)
- Open Cyberduck:
- a. For Windows: Open Cyberduck from your Start menu.
- b. For macOS: Open Cyberduck from the Dock or Launchpad areas.
- Click the "Bookmarks" icon in the Cyberduck application.
- Click the "+" icon near the bottom of the Cyberduck menu to create a new bookmark.
- Configure the WebDAV connection:
- a. Change the connection type from the default 'FTP' to 'WebDAV (HTTPS)'.
- b. In the "Server" field, paste the Seedr WebDAV URL: https://dav.seedr.cc.
- c. Optionally, enter a nickname for the bookmark to help you locate it easily next time you open Cyberduck.
- d. In the "Username" field, enter your Seedr account email address.
- e. In the "Password" field, enter your Seedr account password.
- Click "Connect" to establish the WebDAV connection to your Seedr account.
- Click the "X" icon to save and close the bookmark configuration.
With your Seedr account connected to Cyberduck using WebDAV, you can access your Seedr files directly from your Windows or macOS device.
Connecting Seedr to Nautilus (Ubuntu)
- Open Nautilus, the default file manager in Ubuntu.
- In the File menu, select "Connect to Server."
- In the "Connect to Server" window, choose the service type:
- a. For HTTP connections, select "WebDAV (HTTP)".
- b. For HTTPS connections, select "Secure WebDAV (HTTPS)".
- In the "Server" field, enter the Seedr WebDAV URL: davs://dav.seedr.cc/.
- When prompted, click "Connect" and enter your Seedr account email and password.
- Your Seedr account will now be mounted as a remote directory in Nautilus.
With your Seedr account connected to Nautilus using WebDAV, you can access your Seedr files directly from your Ubuntu device.
The game is almost over! In the next part, we'll cover how to add the mounted Seedr drive to your Plex library for seamless streaming of your media files.
Adding Your Mounted Seedr Drive to Plex
To add your mounted Seedr drive to your Plex library, follow these steps.
Open Plex in your web browser and sign in to your account. Once signed in, navigate to the "Libraries" tab in the left sidebar.
Click on the "Add Library" button and select the library type that best suits the content you want to add, such as Movies, TV Shows, Music, or Photos. Give your library a name and click "Next."
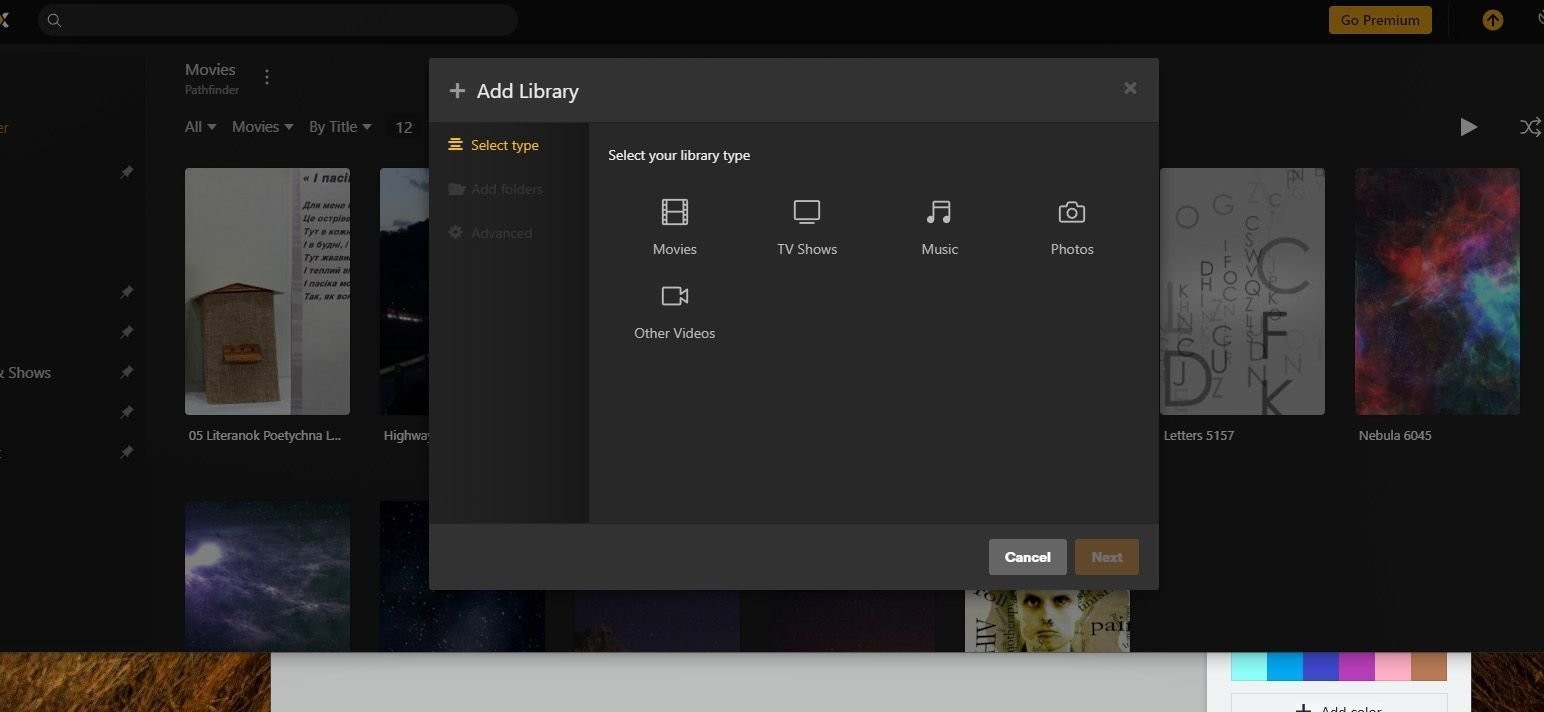
In the "Add Folder" window, click "Browse for Media Folder."
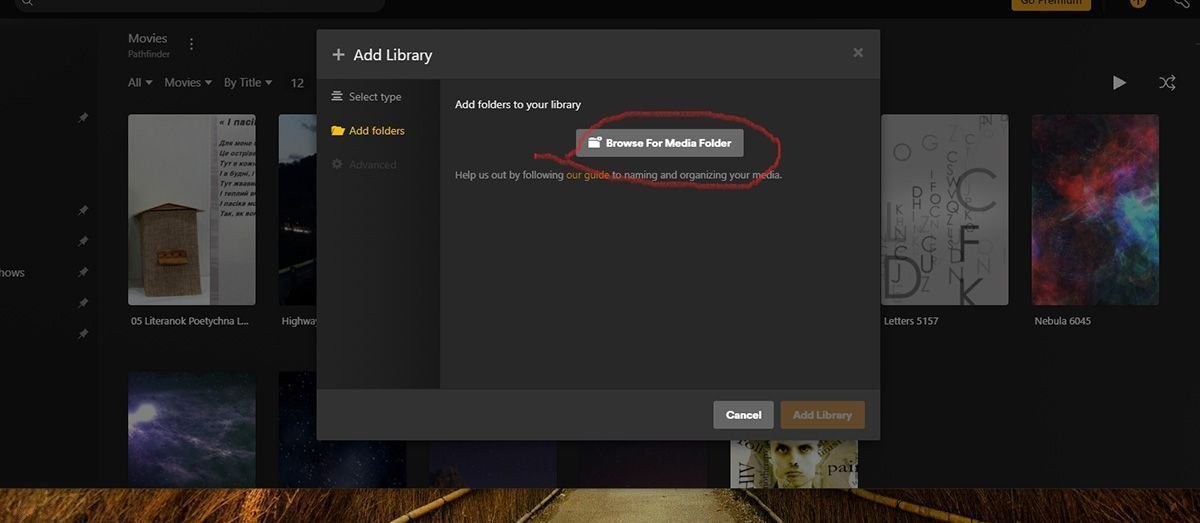
Navigate to the mounted Seedr drive, which should appear as a remote disc in your file browser. Select the folder containing your media files and click "Add."
Finally, click "Add Library" to save the changes. Plex will now scan and index the media files in your Seedr drive, making them available for streaming through the Plex interface.
-1.jpg)
With your Seedr drive added to your Plex library, you can now enjoy seamless streaming of your media files across various devices connected to your Plex account.

